

Introduction
In Brawl Stars, mechanical skill is important, but it is not what separates average players from truly competitive ones. The real difference lies in positioning and map control—two elements that dictate how effectively you engage enemies, secure objectives, and support your team.
This guide focuses on one specific aspect: how to master positioning and map control across different match types. Instead of general gameplay advice, this is a structured progression guide that helps you improve step-by-step, from basic awareness to advanced strategic dominance.
By understanding how to control space, manage pressure, and adapt your positioning based on the map and enemy composition, you will significantly increase your win rate and overall impact in matches.
1. Understanding the Fundamentals of Positioning
Why Positioning Matters More Than Aim
Good aim can win fights, but good positioning wins games. Positioning determines whether you take favorable fights, avoid unnecessary damage, and control key areas of the map.
Players with poor positioning often get eliminated quickly, even if they have strong mechanical skills.
Core Positioning Principles
To improve your fundamentals:
- Stay within effective range of your Brawler
- Avoid open areas without cover
- Maintain safe distance from high-damage enemies
- Always have an escape route
These principles form the foundation of all advanced strategies.
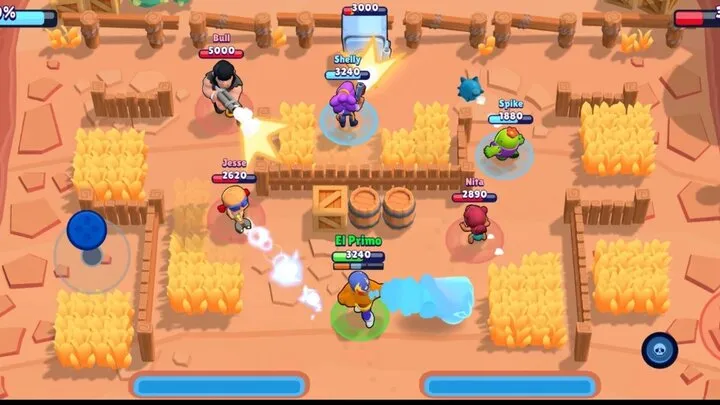
2. Learning Map Layouts and Lane Control
Understanding Map Structure
Every map in Brawl Stars is divided into lanes—left, mid, and right. Each lane has different terrain, cover, and strategic importance.
Controlling your assigned lane is essential for maintaining team balance.
Lane Control Tips
- Choose a lane that fits your Brawler’s strength
- Do not switch lanes unnecessarily
- Apply pressure without overextending
- Support teammates when needed
Strong lane control creates stability for your entire team.
3. Using Cover Effectively
The Importance of Terrain
Walls, bushes, and obstacles are not just decorations—they are tools. Proper use of cover reduces incoming damage and allows you to control engagements.
How to Maximize Cover Usage
- Peek-shoot from behind walls
- Avoid staying in predictable positions
- Use bushes for ambushes
- Break enemy cover when possible
Mastering terrain usage gives you a significant advantage in fights.
4. Maintaining Safe Aggression
Balancing Offense and Defense
Aggression is necessary to win, but reckless aggression leads to quick defeats. The key is controlled pressure.
Safe Aggression Strategies
- Push forward only when you have support
- Retreat when low on health
- Track enemy cooldowns
- Avoid chasing kills unnecessarily
Controlled aggression allows you to pressure without risking elimination.
5. Reading Enemy Movement
Predicting Opponent Behavior
Understanding how enemies move helps you anticipate attacks and avoid danger. Most players follow patterns, especially under pressure.
Observation Tips
- Watch movement habits
- Predict dodging patterns
- Identify aggressive vs defensive players
- Adjust positioning accordingly
Reading opponents turns reactive gameplay into proactive control.
6. Controlling Key Map Areas
High-Value Zones
Certain areas on the map provide strategic advantages, such as central zones or choke points. Controlling these areas often determines the outcome of the match.
Zone Control Techniques
- Hold mid when possible
- Deny enemy access to key paths
- Apply pressure without overcommitting
- Rotate when necessary
Map control is about denying space as much as gaining it.
7. Adapting Positioning by Game Mode
Different Modes, Different Strategies
Positioning changes depending on the game mode. What works in Gem Grab may not work in Showdown or Brawl Ball.
Mode-Based Adjustments
- Gem Grab: Control mid and protect gem carrier
- Brawl Ball: Position for offense and defense transitions
- Showdown: Focus on survival and third-party opportunities
Adapting your positioning increases effectiveness across all modes.
8. Team Coordination and Spacing
Avoiding Overlap
Staying too close to teammates makes your team vulnerable to area damage and reduces map coverage.
Proper Team Spacing
- Spread out to control more space
- Avoid stacking in one lane
- Maintain support distance
- Rotate when teammates fall
Good spacing improves both offense and defense.
9. Recovering from Losing Position
When You Lose Control
Even strong players lose map control. The key is knowing how to recover without making the situation worse.
Recovery Strategies
- Fall back and regroup
- Use cover to regain ground
- Wait for teammates
- Avoid solo pushes
Patience is critical when recovering from disadvantage.
10. Advanced Positioning Mindset
Thinking Ahead
At higher levels, positioning is not just reactive—it is predictive. You must think ahead and plan movements before they happen.
Advanced Tips
- Anticipate enemy rotations
- Control space before fights begin
- Force enemies into bad positions
- Adapt constantly
Mastery comes from awareness and decision-making, not just mechanics.
Conclusion
Mastering positioning and map control in Brawl Stars is one of the most impactful skills you can develop. It allows you to take smarter fights, support your team effectively, and control the pace of the match.
By focusing on fundamentals, understanding map structure, and gradually applying advanced strategies, you can significantly improve your gameplay. Positioning is not about standing in the right place—it is about making the right decisions at the right time.
With consistent practice and awareness, you will transition from reacting to the game to controlling it.